Introduction to Photo Stacking
Photo stacking stands as a pivotal technique in contemporary photography, offering enthusiasts and professionals alike a powerful method to elevate their images. At its core, photo stacking involves the meticulous amalgamation of multiple exposures of a single scene. This approach is primarily aimed at enhancing the depth of field, ensuring that subjects across varying distances are in sharp focus, and culminates in an image of remarkable clarity that would be challenging to achieve with a single shot.
The benefits of photo stacking are manifold. By compiling several exposures, photographers can overcome the limitations of their equipment, particularly in scenarios where achieving extensive depth of field in a single frame is impractical. This technique is especially advantageous in landscape photography, where the aim is to depict sweeping vistas with foreground elements and distant horizons equally in focus. Similarly, in macro photography, photo stacking allows for the capture of intricate details of small subjects completely in sharpness, mitigating the shallow depth of field that is typical in close-up shots. In astrophotography, photo stacking can significantly reduce noise and enhance the detail of celestial objects, resulting in stunning images of the night sky.
The growing popularity of photo stacking can be attributed to advancements in digital photography and software. Tools such as Adobe Photoshop, Helicon Focus, and specialized stacking software enable photographers to seamlessly blend multiple images. These applications come equipped with sophisticated algorithms that align and blend exposures accurately, even accommodating minute shifts in the camera’s position or changes in the subject’s alignment. The process often involves shooting in a controlled manner, using tripods and consistent lighting, followed by detailed post-processing to achieve the desired outcome.
In summary, photo stacking represents an essential technique for photographers aspiring to produce images with superior depth, clarity, and detail. Its rising use in landscape, macro, and astrophotography underscores its versatility and effectiveness. With the right tools and a fundamental understanding of the process, anyone can start mastering photo stacking to capture stunning, high-quality images.
Essential Equipment and Software
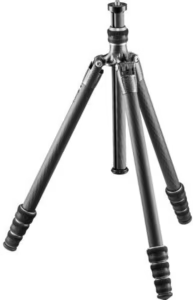
Effective photo stacking necessitates precise and stable equipment, beginning with a
sturdy tripod. A robust tripod is indispensable to prevent any camera movement between shots, ensuring the images align perfectly during the stacking process. Both DSLRs and mirrorless cameras are highly suitable for photo stacking, provided they allow for manual focus adjustments. Manual focus is crucial, as it offers the photographer complete control over focusing on different parts of the subject.
Lenses with a good depth of field, such as macro lenses, are preferred for close-up photography and photo stacking. A
remote shutter release or an intervalometer can significantly reduce camera shake, which is often caused by pressing the shutter button manually. These tools automate the exposure process, maintaining consistency across the shots and enhancing the final stacked image’s sharpness.

As for software, Adobe Photoshop is a popular choice due to its extensive range of photo editing capabilities, including photo stacking. Photoshop offers a relatively user-friendly interface for aligning and blending multiple images. Helicon Focus is another excellent tool specifically designed for focus stacking. It excels in handling a large number of layers and offers detailed controls over the stacking process. Zerene Stacker is also highly regarded, particularly for its advanced algorithms that produce finely-tuned, high-quality stacked images.
Each software has its unique strengths. Photoshop’s versatility makes it a good all-around choice for various types of editing tasks, while Helicon Focus and Zerene Stacker are specialized tools that provide precision and fine detail, catering specifically to the photo stacking community. By employing these techniques and using the recommended equipment and software, photographers can achieve stunning, intricate images that showcase a depth and clarity beyond the capability of a single exposure.
Step-by-Step Guide to Photo Stacking
In the field- Capture the shots:
- To master photo stacking, the initial step involves meticulously setting up your scene and camera. Start by placing your camera on a stable tripod to prevent any movement that can disrupt the stacking process. Ensure that your subject is well lit. Utilize consistent and diffused lighting to avoid harsh shadows and varying light intensity, which can complicate post-processing.
- Next, select the appropriate focus points. Manual focus is typically recommended as it provides greater control over each shot. Begin by focusing on the closest part of the subject. Using a remote shutter release or a camera timer, capture the first shot. Afterward, adjust the focus slightly further away and take the next shot. Repeat this process, incrementally shifting the focus plane until you have covered the entire depth of the subject. Maintaining consistent exposure settings is crucial. Set your camera to aperture priority mode to control the depth of field, or use manual mode to fix both the aperture and shutter speed. This ensures uniform exposure across all images, simplifying the stacking process. Additionally, consider using a low ISO setting to minimize noise and preserve image quality.
- Check using the viewfinder of your camera that each photo captured is in focus at the desired area. Do not unpleasantly surprise yourself by going home and only find yourself in the situation where one of the shots is blurred.
Please see an example of a shot with the focus points marked below:
 Post Processing:
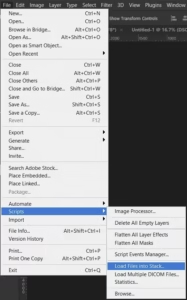
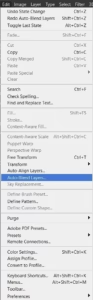
Once you have captured all necessary shots, the next stage is post-processing. Import your images into photo editing software that supports photo stacking. For this tutorial we will use Adobe Photoshop.
- Load images into stack.
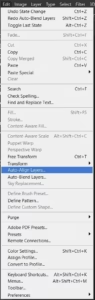
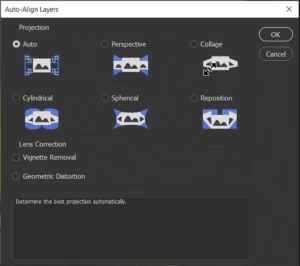
- Begin by aligning the images to correct any minor shifts or rotations. This can usually be done automatically within the software.
- Once the images are aligned, blend them together to combine the sharpest parts from each shot into a single, detailed image.
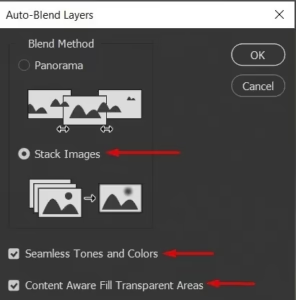
While blending, pay attention to avoid common issues such as ghosting or misalignment, which can occur if the subject or camera moved slightly between shots. Utilize the software’s masking and brush tools to fine-tune the blended areas, ensuring a seamless and natural look.
By following these detailed steps, from setup to post-processing, you can effectively use photo stacking techniques to create stunning, high-quality images that stand out.
Advanced Tips and Tricks for Photo Stacking
For enthusiasts aiming to elevate their photo stacking skills, mastering a series of advanced techniques can make a substantial difference. One major challenge often encountered is dealing with moving subjects. To address this, consider using software features that offer alignment and blending options specific to managing such variations. Utilizing a tripod and remote shutter release can also help minimize movements and ensure consistent shots. Moreover, focus on short burst shooting to capture multiple frames in rapid succession, thereby reducing the impact of subject movement.
Changing light conditions pose another challenge that can affect the outcome of your photo stacks. The key here is to maintain consistent exposure settings throughout your series of shots. If you’re dealing with fluctuating natural light, such as during sunrise or sunset, opt for manual exposure modes to lock in exposure values across the entire sequence. Gradual filters can be employed to balance the exposure in cases of high contrast lighting scenarios.
Noise and artifacts can be significant hurdles in photo stacking. To minimize these, ensure you capture your images in RAW format for maximal post-processing flexibility. Use noise reduction techniques in your editing software, and consider stacking multiple dark frames and flat frames to correct sensor noise and lens irregularities respectively.
Exploring the creative potential of photo stacking can also be incredibly rewarding. Incorporating High Dynamic Range (HDR) techniques into your stacks can bring out details in both the shadows and highlights, producing a more balanced and vivid image. Focus stacking is particularly useful for macro and landscape photography, allowing for greater depth of field by combining images focused at different distances.
Creativity in photo stacking thrives on practice and experimentation. Don’t hesitate to try different settings, subjects, and lighting conditions to discover what yields the best results. To refine your skills further, consider joining photography communities or forums. Engaging with other photo stacking enthusiasts offers the opportunity to share your work, gain feedback, and stay updated on the latest techniques and advancements in the field.
This post may contain affiliate links, which means that I may receive a commission if you make a purchase using this links. As an Amazon Associate I earn from qualifying purchases. Nevertheless tis site always displays true and honest review and information and will not try to mislead audience in any way.